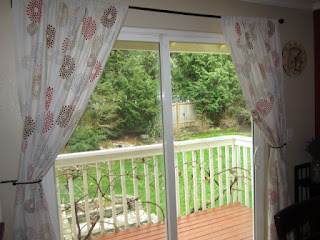
Now, as I said in the last post, they really aren't THAT bad. They certainly do not go with our color scheme though, so I moved these downstairs and had decided I was going to stencil my own since I couldn't find any I liked.
This was pretty simple to do, but it is very time consuming, so plan on this taking several days.
What you'll need:
Plain drapes
Fabric Paints in the colors you want
stencils
sponge or stencil brush
paper plates
painters tape
I found some cheap plain linen drapes and laid them out on garbage bags in my garage.
I mentally mapped out where I was going to put my stencils and colors. I have 4 colors; red, brown, camel and grey.
Tape down your stencil so that it 1.) stays in place, and 2.) covers up the edge and other stencil patterns so you don't get paint where you don't want it.
I ended up using a lot more tape after this picture :) Then put your paint on a plate and dab with the sponge. Make sure you dab away from your paint blob to get off any access paint. Now lightly press onto your stencil. If you press too hard or have too much paint, it can get underneath the stencil and cause bleeding or smudging. Get you paint into each hole in your stencil and take care that no spots were missed.
Now gently pull your stencil off and place in the next spot.
Isnt that preeeeetty!? I did both big and small stencils in each color. First I used a slightly burnt red.
Then an espresso brown.
A nice camel color.
Finally I used a grey. I made this a but lighter than the rest because I wanted it to be a little more "ghosty" in the background... if you know what I mean...
Now I really liked overlapping the big and small ones at some points. I kept all the small ones separate from each other and the big ones separate from each other. I loved the way that it turned out and it kept my eye from catching anywhere in particular, which Is exactly what I wanted.
After my drapes were all dry I hung them up!!! I am so happy with how they turned out!! They match my colors and they are unique and fun without being too loud. Heres the before and after...
and..... after!


No comments:
Post a Comment