Flat faced frame of any kind
Scrapbook paper
Glue or Mod Podge
Small wooden figure
Foam Brush
Paint
Scissors
Glue Gun
I didn't have any Mod Podge so I had to make my own. I also didn't have any regular glue (and I call myself a crafter) so I grabbed a glue stick I had, cut off the tip and squeezed the glue into a container.

All you need to do to make your own Decoupage glue is add a little water to your glue. About 4 parts glue to 1 part water. Mix it up and you're ready to go!
Lets do this...
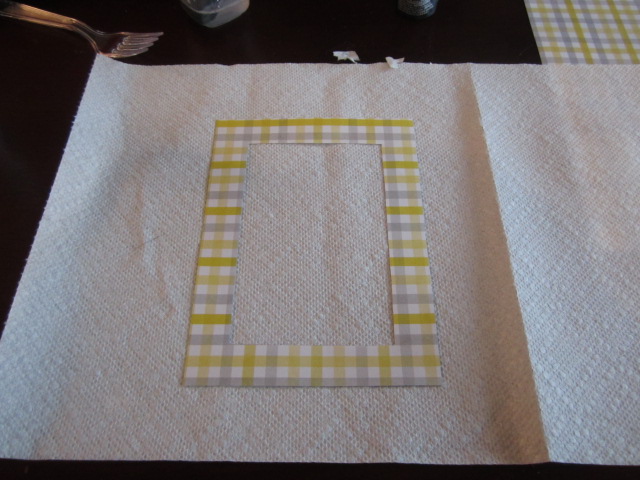
Remove the back and the glass from the frame and place face down on the wrong side of the paper so you can trace around the outside and inside of the frame.


Once you have the shape of your frame traced into your paper, go ahead and cut it out.
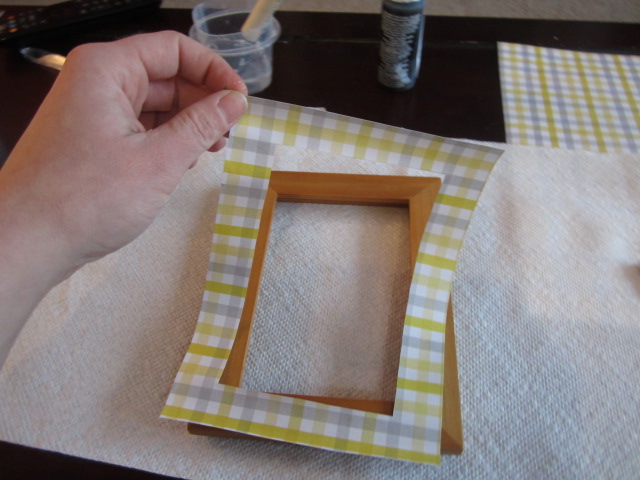
Using your foam brush, smear some glue onto the back of your paper and carefully place onto the front of the frame.

Make sure you smooth out any creases or bubbles and that there is no frame showing around the edge of your paper.
If you are happy about your paper placement, apply some glue all over the front of the paper and down the sides of the frame. The paper is going to look wet and ruined but I swear when it dries it will looks fine! I promise!

Then we wait for it to dry completely. I took some pictures of my adorable little Lovey love Dog, Archer. He was not impressed with my disturbing his nap....


See, hes quite annoyed... I love him so.
Anyway! You are going to be putting 3 to 4 more coats or glue over the frames, and wait for them to dry each time in-between. This can be a slow process but its worth it. So after you take a few pictures of your beloved animal, we can prepare the wood figures that you will place on your frame. I had birdies on hand so that's what I used. Try to use paint that will complement the paper you used. I painted the birdies grey and will use yellow lettering.


When those dry, use a paint pen or just a small brush and paint (if you have a steady hand) and write whatever you like on your wood figures. I made a "Friends" and a "Best Friends" frame so I went with that


I sprayed both my frames with some lacquer as well to make sure they were sealed well. I let that sit for about 24 hours before I put the backs back into the frames and enjoyed my handy work! My girlfriends loved their frames! Enjoy!

these came out sooo cute!
ReplyDelete